The Controls
![]() Process - When all entries are performed, click the Process button to save and apply the data, and create the check
Process - When all entries are performed, click the Process button to save and apply the data, and create the check
![]() View - View the check as it will be printed based on currently entered data
View - View the check as it will be printed based on currently entered data
![]() Charge - Spread the charge across GL accounts
Charge - Spread the charge across GL accounts
![]() Pay - Spread the payment across GL accounts
Pay - Spread the payment across GL accounts
![]() Exit - Exit the transaction for this vendor
Exit - Exit the transaction for this vendor
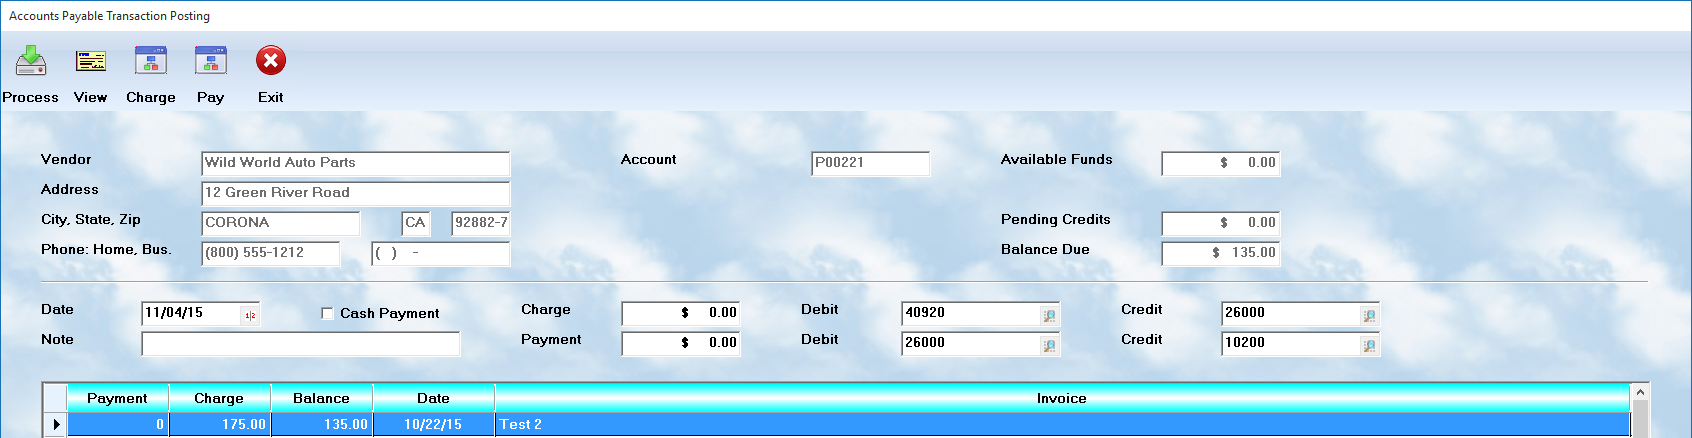
The Data
Vendor Information - This is a display of the Vendor's name, location, and contact information. Edit these values in the main screen of Accounts Payable.
Account - The Vendor's assigned account number
Available Funds - If you have money already to disperse, it shows here.
Pending Credits - If you have credits posted to this account, it shows the amount here.
Balance Due - This is the total balance due for this account.
Date - This is the date for processing this transaction
Cash Payment - Check this if you have made a cash payment. This is most useful for items that were delivered and you simply paid the provider in cash.
Note - Use this to record check numbers, or other relevant information, for this transaction
Charge - The amount to enter into the account as a charge
Payment - The payment amount which may be an accumulation of payments for multiple invoices.
Debit / Credit - The appropriate GL account numbers for the charge and payment posting
The Process
Payment cycle First select the payment cycle. Enter in the one you wish to process. This will be identical to one of the payment cycles you established when setting up your original vendor accounts. Now the accounts for this cycle will be the only ones showing in the list at the bottom. Highlight the first account you wish to pay.
Post: Next, select the Post button. You will see the following screen:
Processing
Double click on each of the items you wish to pay. The system will display the amount due in the pop-up box. You can reduce this amount if you wish, or simply accept and move to the next item. The Payment box will increase as you select additional records to pay. Continue through all of the items you wish to include on this payment.
The payment will be applied to the default Debit and Credit accounts shown on the screen. If you wish to have it applied to one account different than shown, simply change it on the Payment line. However, if you wish to spread the payment across multiple GL accounts, use the Pay button and specify the account numbers, and amount that goes to each.
When you complete the assigning of payments, you can Process the transaction. This will complete the work, allow you to write the check, and then you can move to the next account.
Printing checks
When the processing is complete, the system will ask if checks are to be written. First, it must know which account is to be used. Then it will ask if checks are to be developed, and printed, by the system. If not, the system will assume that all bills are being paid by manual checks, and it will display a list of vendors and ask for the check numbers assigned. Otherwise, it will automatically assign the checks, and proceed to print them. When paying multiple invoices, for example, the system will attempt to list on the stub all invoices paid, to the limit of the space available.
Final processing
Once the checks have been completed, the system will process all of the payments, posting them to the transaction register, and to the General Ledger. This is the final step because everything else must be correct prior to performing the accounting.
Reminder: Payment cycles should correspond to a period when the vendor expects to receive funds.