The Scheduler permits the maintenance of appointments for the shop as a whole, by technician, or by work area or any combination. The system is very easy to understand, and operate, and the process will help to organize the workday.
About the Scheduler
Most people have Calendar programs on their computers, but they are not "system wide" unless they have invested in full server technology and costly exchange programs. The Auto Shop Writer scheduler permits any workstation to view, add, and edit appointments to the master system. You can also attach a client, or a vehicle plus client to the appointment, and you can create a quote which can be added to a workorder automatically.
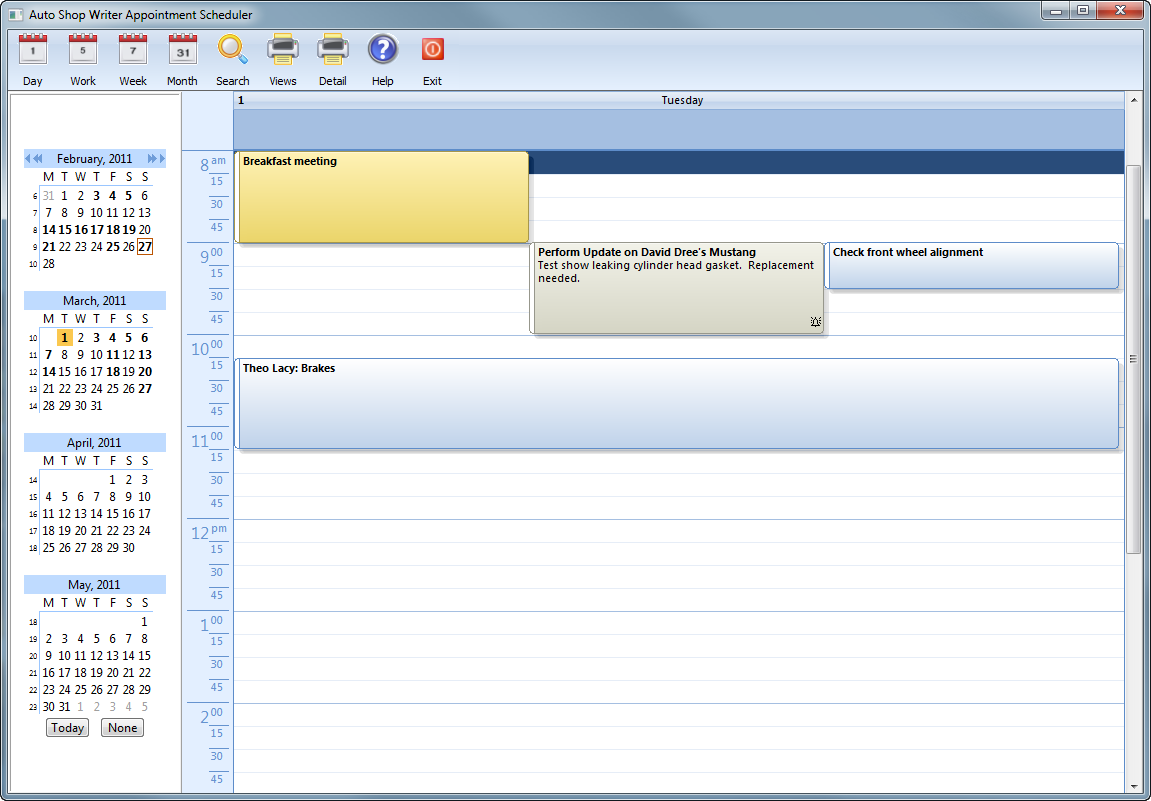
The scheduler window shows a browse box of appointments for the current date, and edit boxes to enter, or modify, the data. Each of the controls is explained below.
Workorder Interface
When creating a new workorder, you will see an Appointment button. Selecting that will show a list of pending appointments. Selecting one will then instruct the program to create a new workorder ( Estimate, Invoice, or Counter Sale as instructed on the top part of the Add Workorder screen ), adding the client, vehicle, notes, plus any parts and labor saved to that appointment. Only select the type of workorder before pressing the appointment button.
The Scheduler Controls

The appointment bar allows you to quickly select various options.
View selection
The first four calendar icons will instantly change the view from the selected Day, to Work week, full Week, or Month. You can also select views by the Day, Week, Month, or Time Line mode buttons. Finally, see the notes on the Date Picker to understand options for custom date ranges.
Search
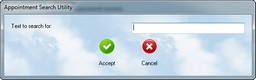 The search icon is simple, but powerful. When pressed, you will be asked for a search term. You can use a license, name, or any other word that makes sense. The search will look at the summary line, detail notes, vehicle information, and client information, and then display a list of matches. Find the one that best meets your need and double click. The system will jump to, and highlight that appointment.
![]() Printing
Printing
Views - This option will print the view you have currently selected ( day, week, month, selected range ). It provides the same information that is shown on the window ( summary plus detail, times ).
Detail - This option will provide a detailed listing of all appointments for a selected date range. It will include the heading, vehicle and client information, contact number, and detail.
The Date Picker
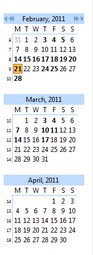 The Date Picker serves many purposes. First, it is a display of dates over a three month range. Any date with an appointment will be shown in bold. Today is highlighted, and the selected date is framed.
To have a new day view, simply click on a date displayed. The system will then display that date.
You may also click on a date, then hold down the left mouse button and drag it down to highlight any range of dates. Your view will automatically change to the highlighted view. If you do this, when you do a Print View, what is highlighted will be printed.
Adding New Appointments
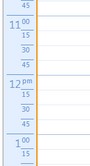 To create a new appointment, move to the date, then click on a time on the timeline display when you want the appointment to start. Then start typing in the information you want in the Summary Description line. When you finish, the appointment will be created at the time you selected. You may then double click on the new entry to enter the full edit mode. If you are creating quick appointments, without details, then you are now finished.
To put in an all day event, click on the bar at above the timeline, and under the date. This solid bar is where you create fixed, or all day, events.
Adjusting Times
Click on an appointment, and it will display a box. The system will default to a 15 minute appointement. Just drag the box in the bottom center down until the appointment fills the desired amount of time. As an alternative, you can adjust the time in the full edit mode, although this method will be faster.
Multiple Days
To stretch an appointment across multiple days, switch the month mode, click on the appointment, and then drag the right side across the days you wish to cover.
The Appointment Editor
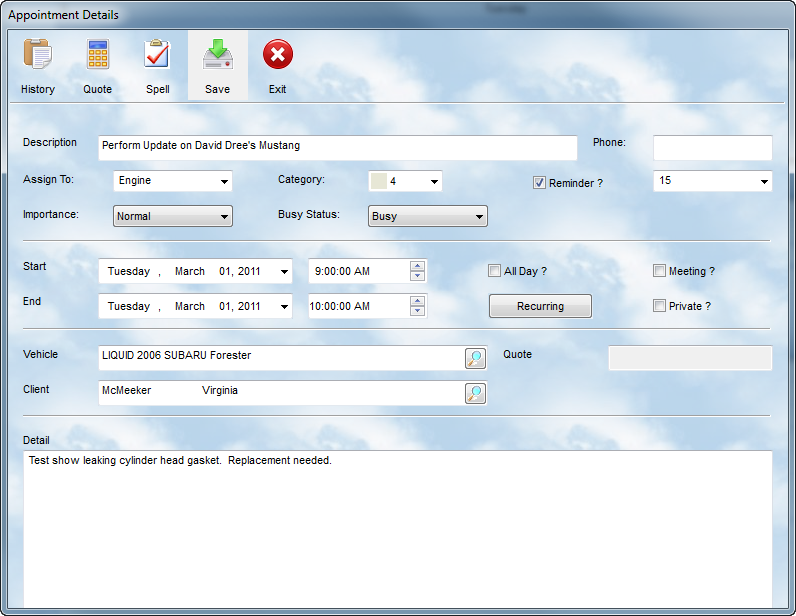
To enter the edit mode, double click the left mouse button while pointing to any appointment in any view.
The Appointment Description
Enter a brief statement about the service to be provided. Include the first and last name of the client, and the service, ie. John Hawkins, Tune Up - 67 Mercury. Although some clients may hesitate to provide their first name, it will help you if you should have to do a search later. You may have 100 Mr. Smith's with appointments still in the future. However, the search system will locate Mr. Hiram Smith very quickly.
Phone
When you set an appointment, be sure to ask for "the best contact number". This allows you a quick way to contact the client should there be a need to make a change.
Assign To
You can assign appointments to any person, area, or type you wish. You will create a list in the ASW Tools - Lists - Assign menu option. The options are strictly ones that work best for your business. Some people make appointments by tech, while others do it by service area.
Category
You can assign a color designator to each appointment. You will probably create your own reference for what the colors mean. Sometimes it may be the service type, while others might want to use this to track status of appointments ( waiting, AM return, PM return, etc ). Be sure to select the color you wish to use.
Reminder
You can turn on the reminder for an appointment by clicking in the box, and then specifying how long ( in minutes ) before an appointment you wish to have a reminder.
Importance
There are three levels of importance, low, normal, and high. Select the one which best fits this activity.
Busy Status
When looking at the calendar in the various views, the left side of each appointment reflects the busy status. Make your selection from the drop down list, and when exiting the Appointment Details dialog, you will see the display that corresponds to that option.
Start / End Date(s) and Time(s)
It is easiest to adjust the dates and times using Drag and Drop on the calendar control. However, any changes made to the dates and times in the edit dialog will automatically reflect on the views when you exit the edit screen.
All Day
Selecting this will remove the time fields, and place the appointment at the top of the calendar view.
Meeting
If you select this option, the calendar event will display a small person icon
Private
If you select this option, the calendar will show a small lock icon on the appointment
Recurring
You can create repeating appointments with this button. It will only work once on a scheduled appointment, and then tell you it has already performed this operation once ( to eliminate unwanted duplicate entries ). When you press the button, you will see:
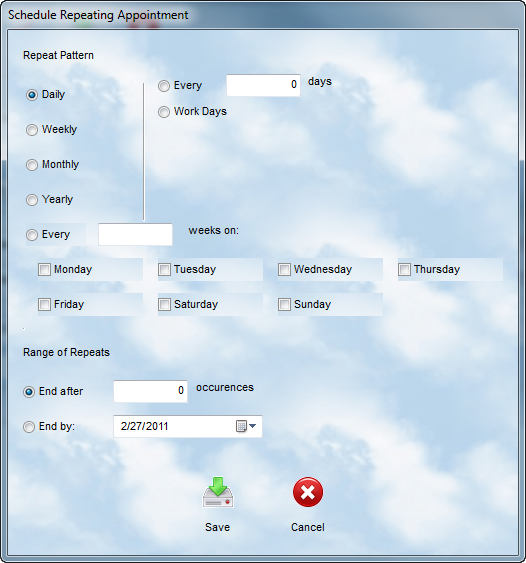
You need to include two steps. First is the Repeat Pattern. If you want to create an appointment every Monday at 8:00 am ( ie. a staff meeting ), go to the date of the first occurrence, and create the appointment, making the first entry. Then Press the recurrence button. When this screen comes up, you would select weekly, and it will automatically create an appointment every Monday until you come to the specified end. If you wanted to schedule an appointment for multiple days, used the "Every xxx weeks" option and click the days.
The second section asks for Range of Repeats. You can either have the system create a set number of duplicate appointments, or you can have it run to a specific date.
Once you are sure of your criterion, press the Save button. You will return to the Detail screen for the initial appointment. You can click Save, then Exit and you are finished.
Be sure to make all of your entries correctly in the initial appointment. If you forget to enter some data, you will have to add it manually after you select the Recurrence button. It will duplicate all of the data you entered, but not allow you to redo the work later.
Vehicle and Client
Assigning vehicles to appointments enables the ability to use the scheduler to quickly add new workorders when the client arrives, complete with all of the info necessary to start work. If you lookup a vehicle first, it will automatically assign the client associated with that account. If you don't have the vehicle information on file, you you have the client, select them. If neither is known when making the appointment, leave the field blank.
When you select the lookup icon for Vehicle, you will see a browse window. Initially it will be in License order. Simply start typing the license and you will be positioned to find the correct vehicle. Double click on the record you want to use.
If you wish to look up the vehicle by client name, or by Make/Model, click on the title at the top of the browse window ( ie. Customer ) and the database will be placed in alphabetical order that way. Then simply start typing the last name of the client until you find their vehicle(s), then double click on the one you will be servicing.
![]() Quotes
Quotes
You can add a quote to an appointment. They are created from the quote system which is called with this button, or from the main ASW toolbar. When a quote is added to an appointment, and you select the appointment when creating a new workorder, all of the parts and labor will be automatically added to the workorder itself. You can create a specific quote for an appointment, or you can re-use quotes in the system. Click here to see how to write quotes.
Detail Notes
Often there are special considerations for a service to be performed. Use the Notes option, after the appointment has been added to the list, to write down any information provided by the client. It is very reinforcing to them that you took the time to note their concerns before they arrived. In fact, you may have sufficient notes to pre-write the estimate before they arrive. When the client brings in the vehicle, the operator can go to the computer, bring up the estimate, and ask if anything else is of concern. This will clearly impress the client, because the documentation is ready to print with a keystroke, and they can be on their way quickly. The Notes have full word processing ability. Review the section on Text Editing for more information. If an appointment has notes, a check mark is displayed to the right of the appointment listing.
Moving Appointments
To move an appointment, first switch to the Month view. Then click on the appointment and drag it to the new date. You could then switch to the day view and move it to the correct time ( if different from the original ). Alternatively, you can Edit the appointment and change the date and time values to the ones you desire.
Deleting Appointments
It is not necessary to remove older appointments, but if you do wish to delete one, simply click on it ( so it is highlighted ) and then press the Delete key on your keyboard.
IMPORTANT OPERATING NOTE
The ASW appointment scheduler is multi-user, and it can be accessed at any time from any computer. However, at the present time, the system does not auto-refresh the appointments on all computers automatically. We suggest the following procedure. First, like other areas of the program, enter the appointment scheduler, do your work, then exit. When you go back in you will see all new entries added by other users. If only one person uses the scheduler, then it could run open all day. In fact, it is possible to pull the scheduler window to a separate monitor, or have it running in the background, and perform other work at the same time. Of course, any changes you make on your computer will display instantly on your monitor, and when others start the scheduler, they will be reflected on theirs.