The Inspection Checklist is designed to provide a report to a client on the condition of their vehicle after the service is complete. It is completely customizable. Once you create the list, it will automatically work on every workorder where you wish to add it. This section details how to setup the list. To read about using the list, please go here.
Creating / Editing / Deleting entries
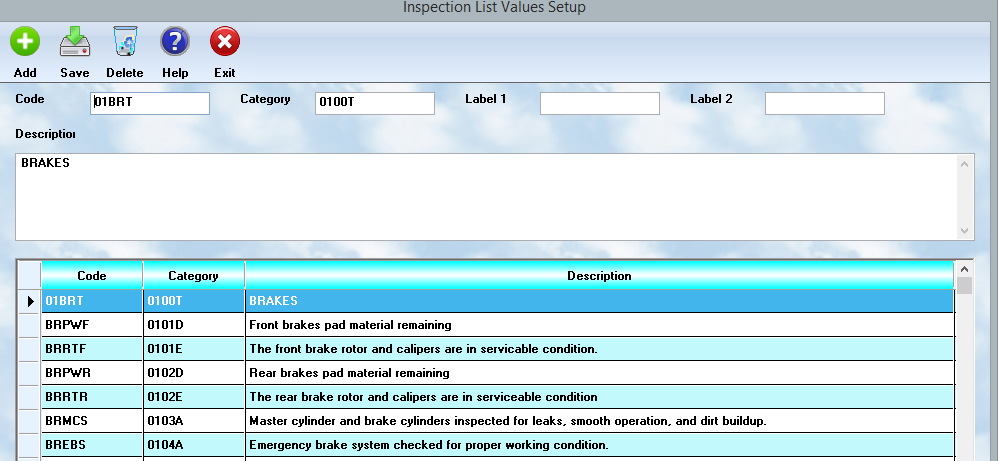
The controls at the top of the screen will be similar to those used throughout Auto Shop Writer. These include the Add, Save, and Delete buttons. To put a new line item on the checklist, use the Add button. Make your changes to the fields and then select the Save button. Finally, to remove unwanted items, highlight them, and use the Delete button.
The Checklist
The lower half of the screen shows the complete list of items for the inspection checklist. They are displayed in the order they will appear on the printout. Whenever you click on a line item, the full details will show on the upper half of the dialog box. Browse the list to be sure you have all of the items in the correct order, and provide a complete checklist of the items you want to be covering.
Record ( line ) details
Code
The Code field carries a reference to the service you are reviewing. These codes can be absolutely anything you want. The field is 10 characters long. You may want to have a naming convention, or use the same codes as you would have in your existing glossary. It's best to have a pattern to use so that all similar services have a common code base ( first 4 characters ).
Category
The heart of how the checklist displays, and prints, is in the Category code. Here there is a very distinct pattern:
Positions 1 & 2 : The group ID. You will want to put all of your inspections in groups so the customer can quickly understand what you are referencing. It may make the most sense to group by service areas of the vehicle, ie. Brakes, Tires, etc. Write down a list of your groups. You can use numbers from 01 to 99. For the numbers 1 through 9, be sure to put a 0 in front of them.
Position 3 $ 4: This is for positioning withing the group. It makes the most sense if you have these in sub-groups. For example, group 01 may be brakes. The subgroup 01 might be front brakes, and subgroup 02 might be rear brakes. These would be listed as 0101 and 0102.
Position 5: There are two reserved codes. T is for Title, and S is for Space ( skip a line ). Otherwise, the codes would be in sequence. We suggest letters here to give you more options, but you could use the numbers 0 through 9. If you had an item 0102A and a 0102B, and you wanted to put something in between, go to the second entry and change it to 0102C, then add a new entry for 0102B. It will then line up properly.
The T in position 5 will cause a record to be a title. On the report it will print with a box around it to nicely format the output.
Label 1 & Label 2
You will only use the label when you want to input a value on the actual checklist ( in the workorder ). For example, you may want to have Tires as your 02 group. You want to show the remaining depth, so 0201A might be a general description. 0201B could have the labels "Left front" and "Right front". 0201C could have the labels "Left Rear" and "Right Rear". On the workorder, you will see the labels on the list, and be able to fill in the values on the fields next to them. Most records will not have a label.
Description
The description field is used for the message you wish to provide on the inspection item. On most post service inspections, these are very short, although you are given enough space to make them quite long. You can include any language you want, but generally it is best to keep it short and very client friendly. Use of technical terms doesn't really help.
We understand this may be a bit confusing at first. Therefore, we uploaded a file to your computer called EPRINL.DBF. You will find it in the ASW9s\MLS folder. You can copy it to the root ASW9s folder, then go into Tools - Index and select the Workorders. Then press the Index button. You can now see a fully constructed checklist. You can add, or delete items, and revise any language to what you prefer. We hope this helps.